SOLISCADA V7.70.00.01 is now available. Important Notice: License Key reactivation is required after updating. Learn what's new and update now→
 SOLISCADA at a Glance
 Architecture
 Why Choose Us
 Essential Functionalities
 Beyond the Basics
 System Recommendations
 FAQs
FAQs Oil & Gas
 Water Industry
 Food & Pharmaceuticals
 Marine
 Mining & Metal
 Manufacturing
 Electric Utilities
 Municipal Industry
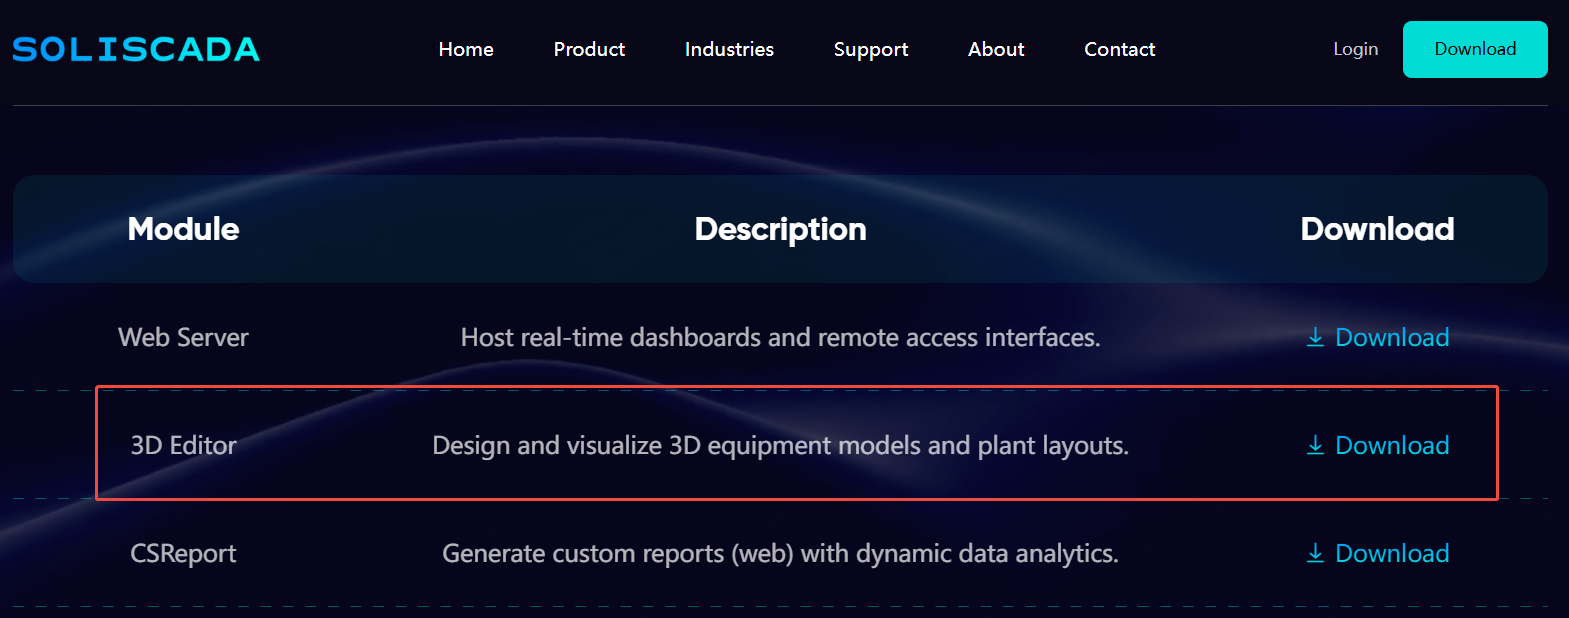
Bring your plant to life with SOLISCADA’s 3D Editor add-on. Below is a clear, user-friendly guide on installation prerequisites, step-by-step usage (device setup, model library, scene composition), and how to request a free license to evaluate the module.
What the 3D Editor does
SOLISCADA’s 3D Editor supports importing and parsing standard external 3D model files (e.g., GLB, OBJ etc.), mapping models to device instances, and binding model animations to live SCADA tags. You can compose and publish 3D process-diagram screens directly in the editor and then integrate those interactive, data-driven 3D scenes into the central SCADA process-diagram environment for real-time monitoring and visualization.
System & deployment prerequisites
SOLISCADA Core: SOLISCADA V6.70.00.00 or later must be installed.
Download the latest Web Server add-on from our website (Downloads page).
Download the latest 3D Editor add-on from our website (Downloads page).
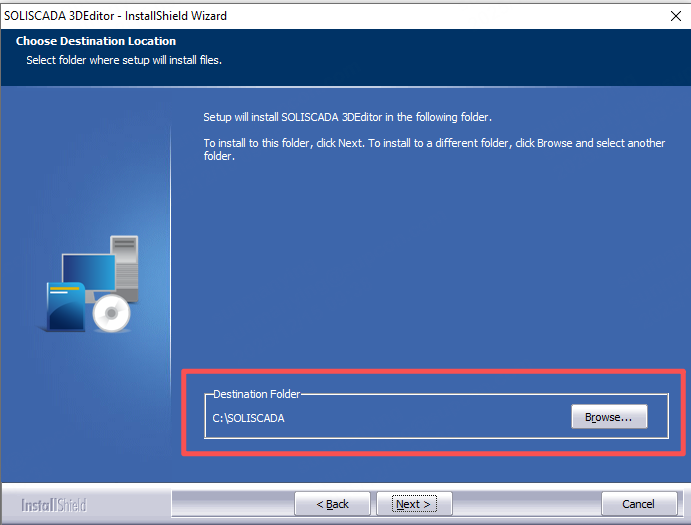
Right-click the installer and choose Run as administrator, then wait for the installer to finish.
In unauthorized mode, users are limited to adding up to 5 devices, importing up to 10 3D model files, and creating up to 2 scenes.
Before you start the 3D editor
In Global Settings, start the WebSocket service.
In your database, add drivers and tags.
Publish the SCADA project (deploy the configuration) and start monitoring so tags are live.
Quick 3-step setup
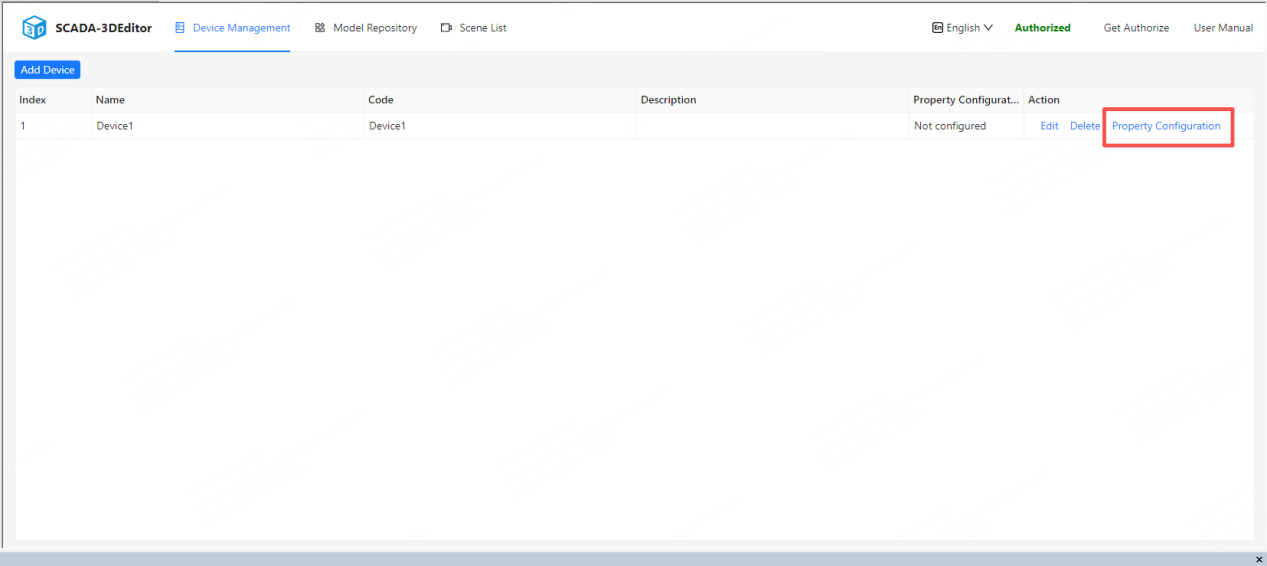
1. Device Management: add devices and define device properties, then bind each device to SCADA tags.
2. Model Library: create model groups, import GLB models, configure model properties, and bind model animations and tags.
3. Screen List: deploy and configure your 3D scenes (screens) for visualization and monitoring.
Step-by-step Guide
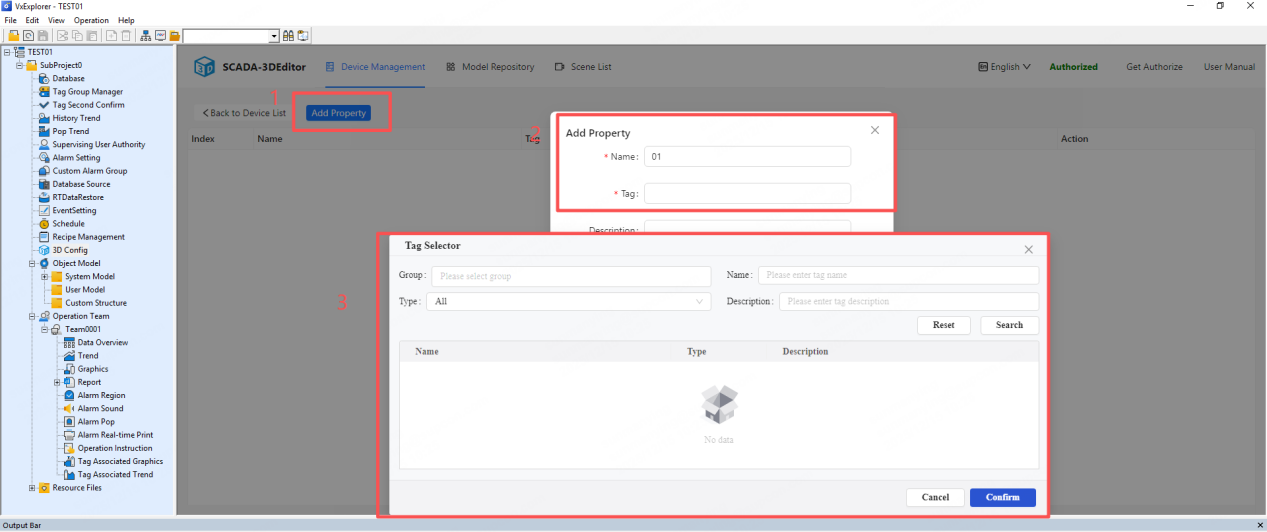
1. Device management
Add a device: create device records (code, name, description). Device code and name must be unique.
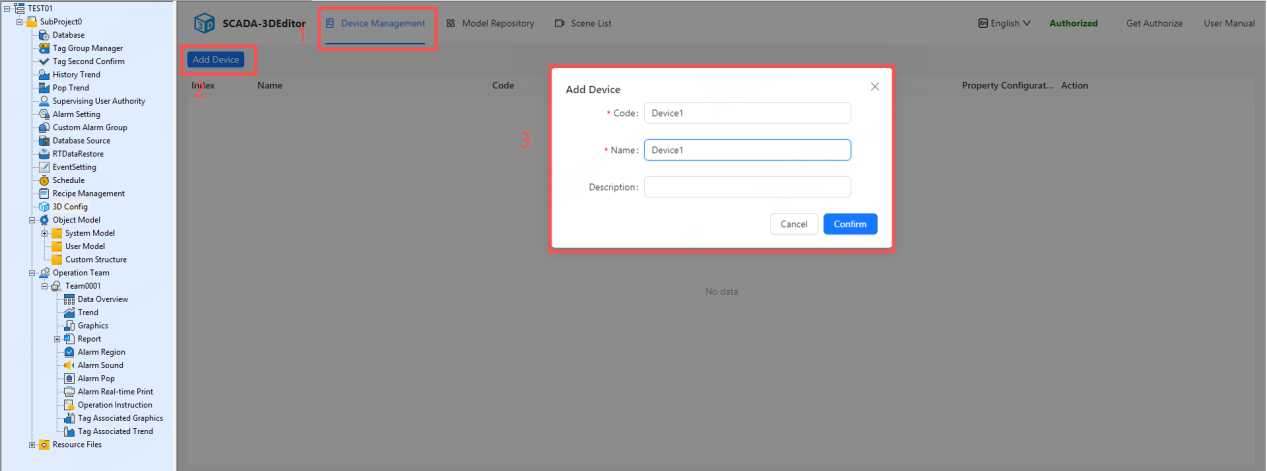
Configure device properties: device properties map to SCADA tags. These tag names are what you'll bind to model animations and data labels.
Click the tag input box to open the tag selector. If no tags appear, check that WebSocket is running and that the project has been published and monitoring started.

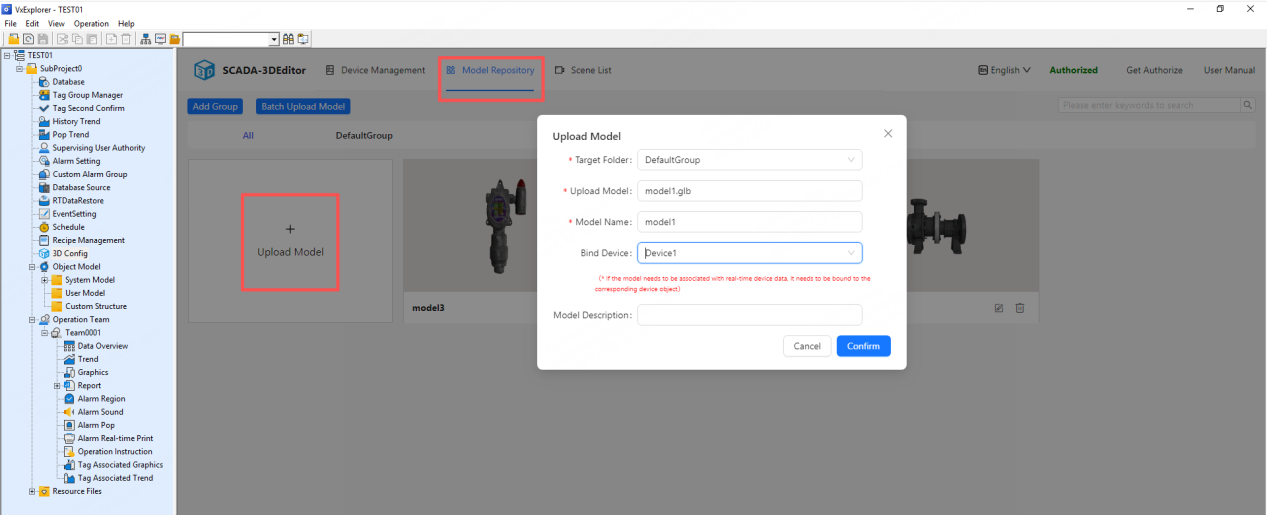
2. Model library
2.1 Import models
add 3D model files, give each model a name, and bind it to a device. Supported formats: GLB, glTF, FBX, OBJ, STL, and DAE.
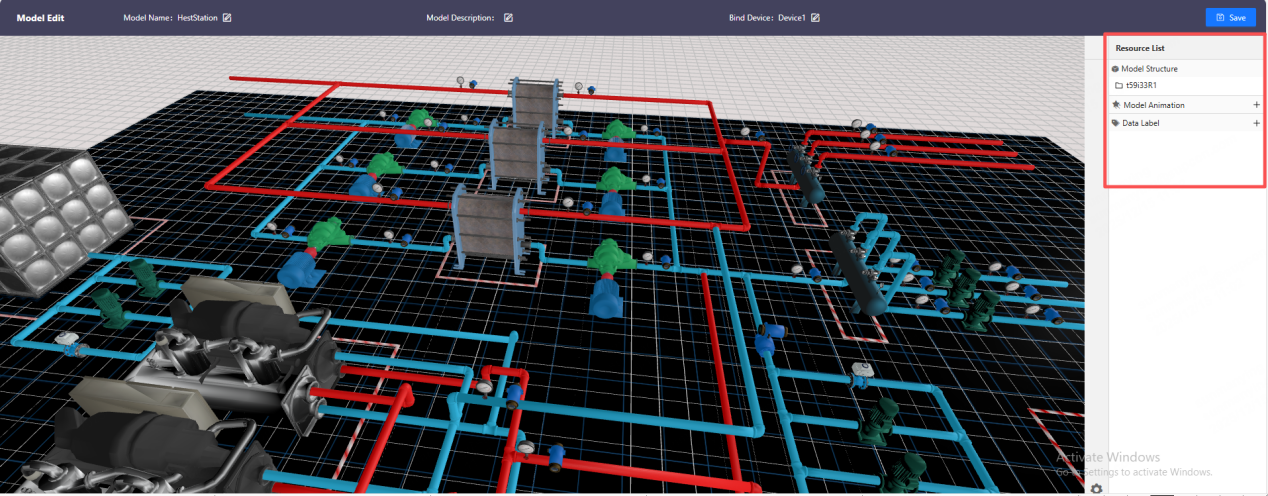
2.2 Model editing
After import you can bind tags, assign animations, and enable data labels.
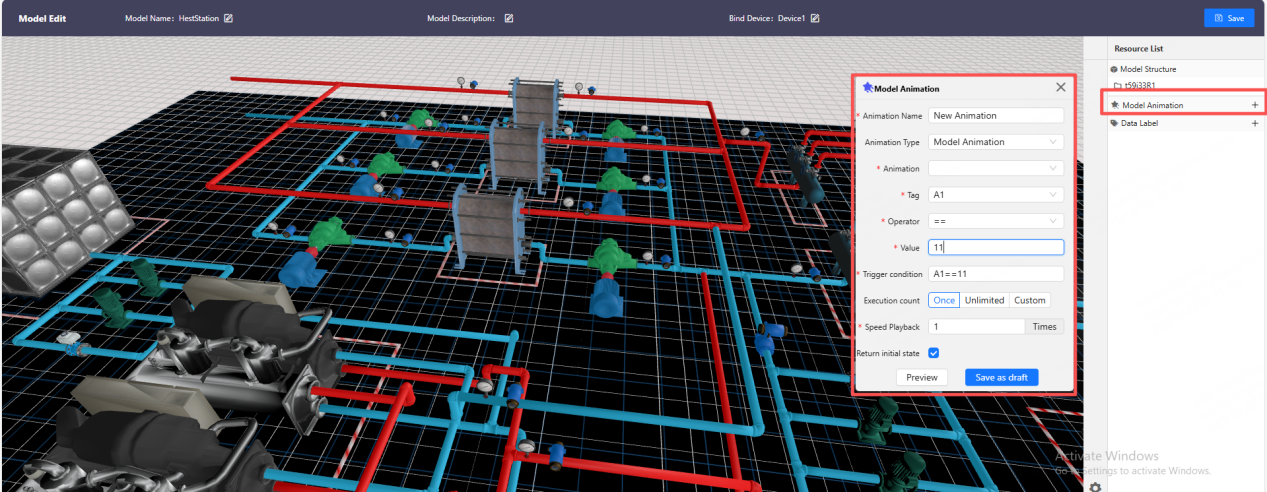
2.2.1 Model animations
choose supported animations for the model, then bind tags and operators.
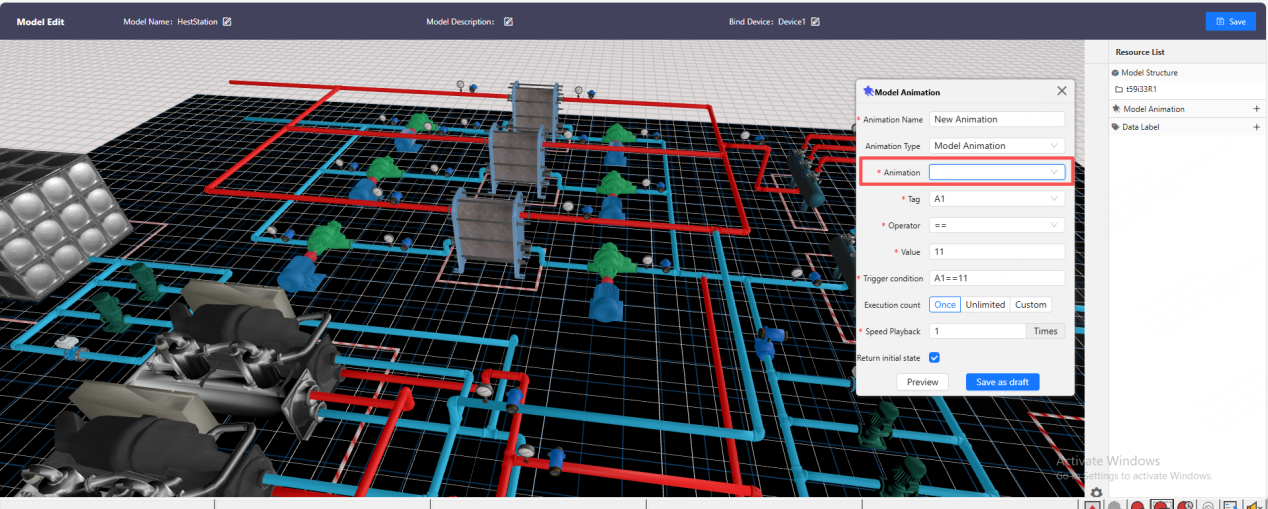
For integer/real tags: set values within the expected engineering range.
For boolean (digital) tags: use true / false.
Execution count: choose whether the animation triggers once when the condition is met or loops continuously.
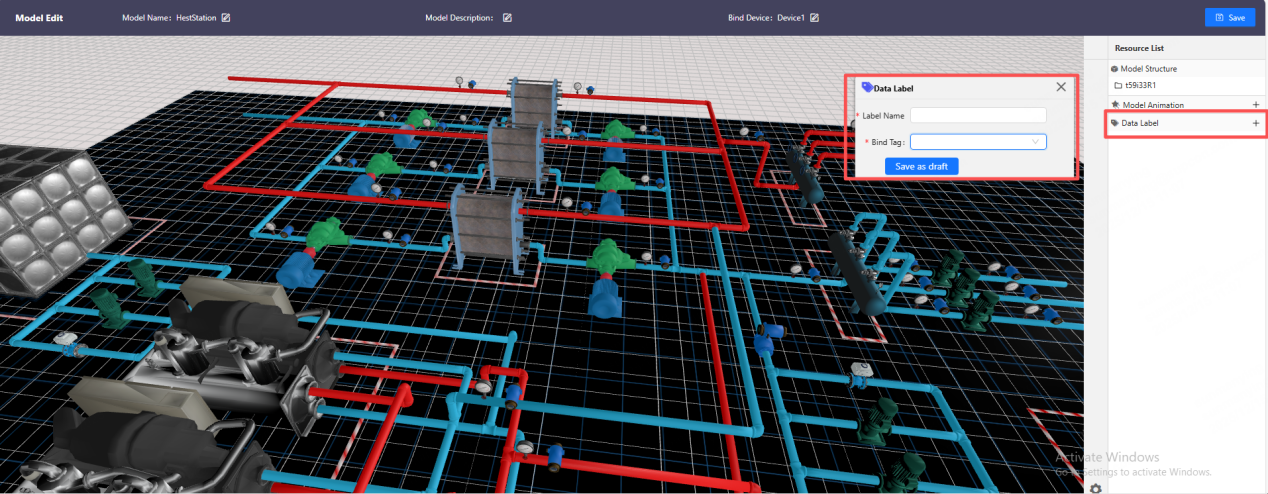
2.2.2 Data labels
when the scene runs, click a model to display its live tag values above the model.
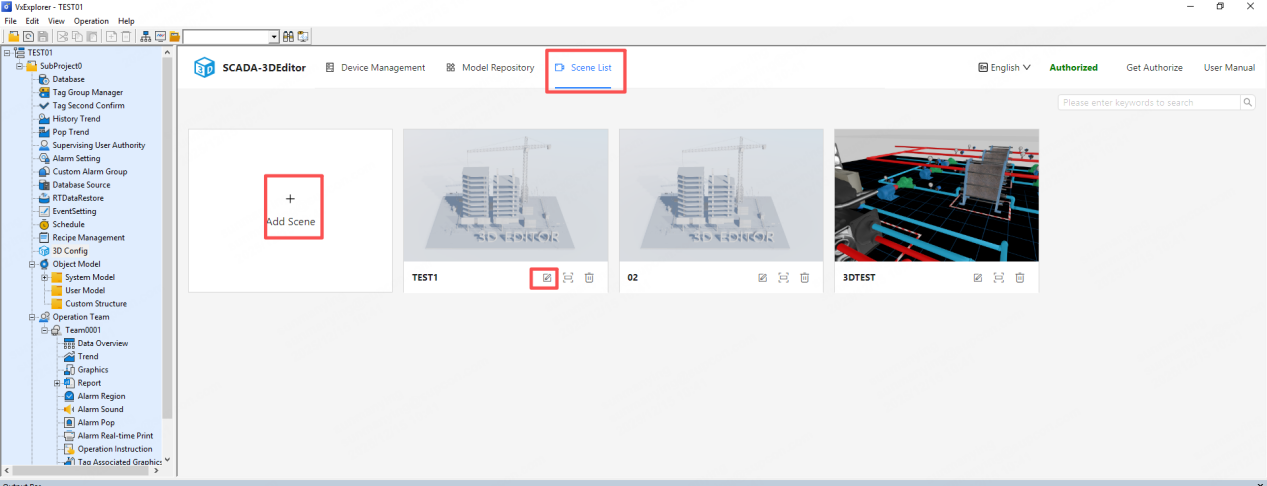
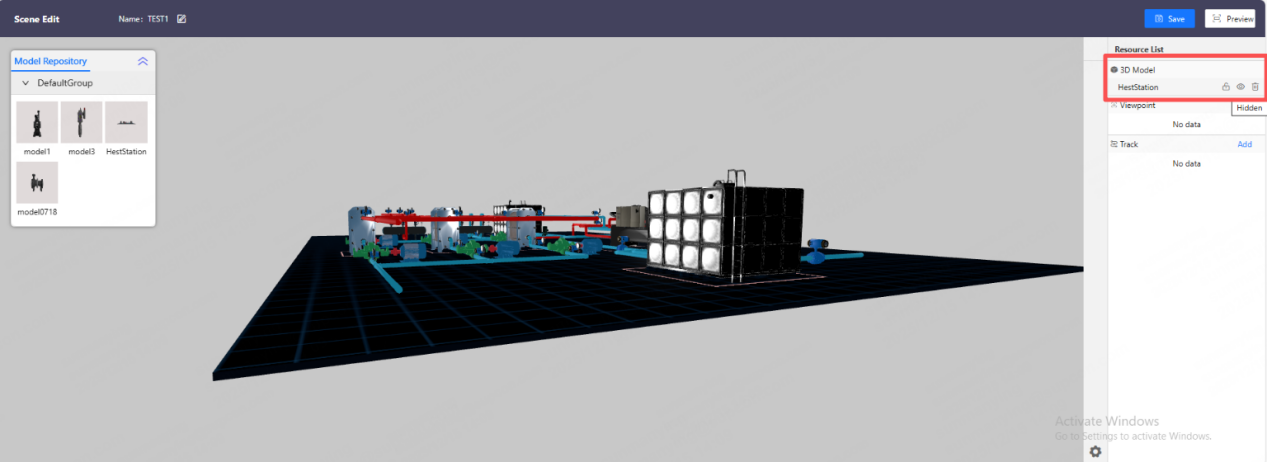
3. Building 3D scenes
In Scene / Screen List, you can add, edit, and preview 3D screens.
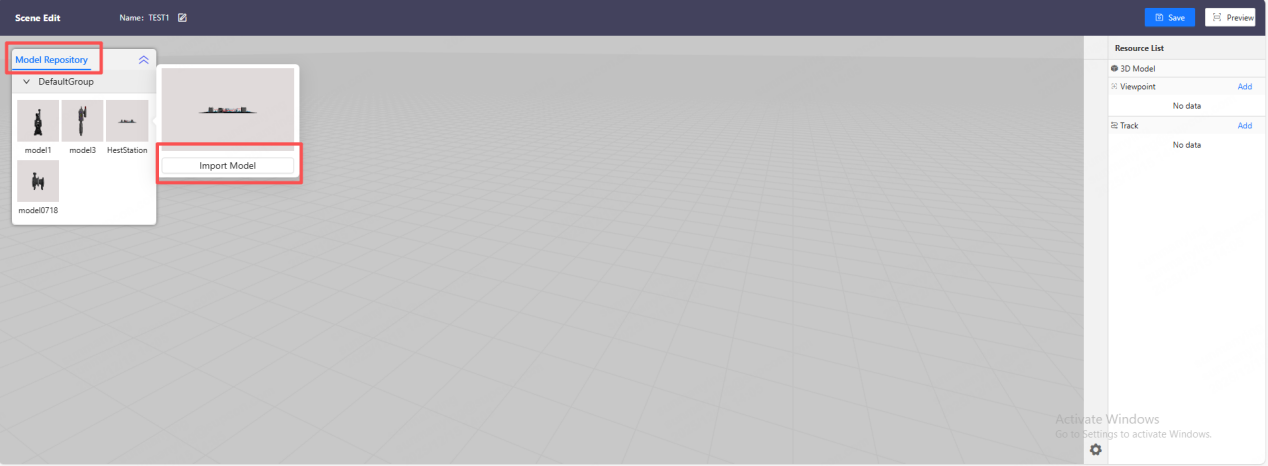
3.1 Importing models into a scene
In the Scene Editor, models are listed by model group in the top-left. Select and import models into the scene. The right side shows the models currently in the scene. You can import multiple models as needed.
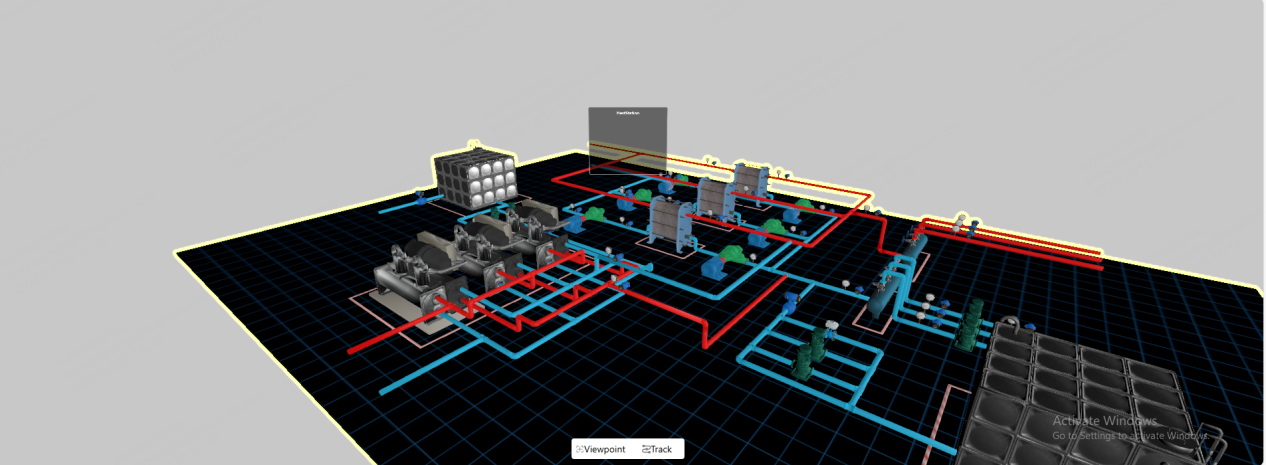
3.2 Model placement & adjustment
select a model in the resource list to edit its size, coordinates, and rotation. Selected models highlight the XYZ axes in the viewport — drag/rotate to position precisely.
Use the lock button on configured models to prevent accidental movement while arranging the scene.
3.3 Preview
Once models are arranged and configured, click Preview (top-right) to see live behavior and animations.
Licensing: want to try it free?
Would you like a 3D Editor license with no limits?
Email us at soliscada@supcon.com and we’ll issue a free license. After activation the license is permanent and removes the unauthorized limits.